In this tutorial I will show you how to install fresh Symfony 5 project and how to make simple CRUD in REST based architecture.
REST or representational stateless transfer is an architectural style for APIs wrapped around the user and the resources accessible to them.
Stateless — meaning the server doesn’t remember anything about the user who uses the API.
CRUD or Create, Read, Update, and Delete are four basic functionalities of an API. Each of them is represented by an HTTP method:
- POST — Create (insert data)
- GET — Read (retrieve data)
- PUT /PATCH— Update (modify data)
- DELETE — Delete (delete data)
I will explain the dierence between PUT and PATCH later in the article, don’t want to spoil the article right at the beginning.
Requirements
- Symfony 5.0
- Faker
Getting Started
First of all, we need the newest Symfony 5.0 skeleton released this month:
symfony new project-nameor with the PHP dependency manager Composer:
composer create-project symfony/website-skeleton project-nameNow you can run the command just to check out everything went fine while downloading:
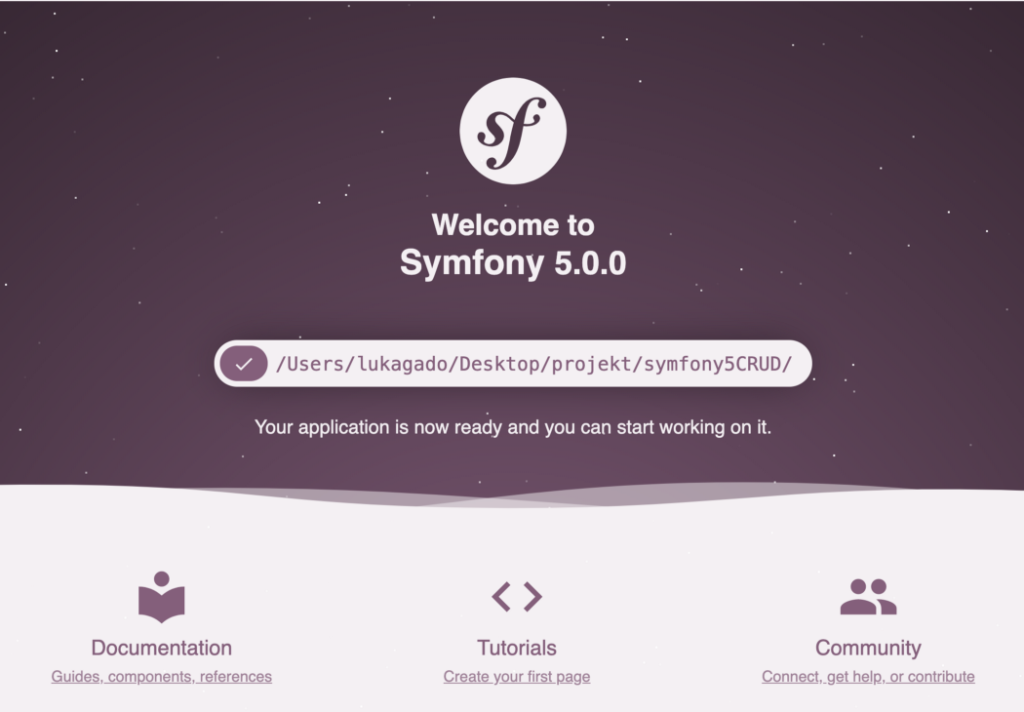
symfony server:startThis command will give you a link to your Symfony index page something like this:

Database and Entity
To make our first Entity that we are going to use in this tutorial with the CRUD functionalities we need to require these two commands:
composer require symfony/orm-pack

composer require --dev symfony/maker-bundle
We need to modify DATABASE_URL parameter in .env file. Insert your username and password you have been provided with when installing MySQL server:
DATABASE_URL=mysql://username:password@127.0.0.1:3306/database_name?serverVersion=8.0Now we are ready to execute something very helpful these bundles are oering us to simply trough terminal generates the entity and the repository and that is:
bin/console make:entityI made a simple Customer entity with properties:
- firstName – string
- lastName – string
- email – string
- phoneNumber – string
You can see our two new files – Customer.php in Entity folder and CustomerRepository.php in the Repository folder. At the top of the Customer entity class, you can see the annotation for repository class – that means both classes interact with each other and Doctrine gives us an instance of CustomerRepository class when the Customer entity is being used. If you check out CustomerRepository class you can see we have two commented examples of functions fetching dierent data by field. So, if you want to make custom methods for searching, updating, deleting, etc … for your entity, you write it in the Repository class.
We will slightly adjust our Customer file in our Entity folder. Above the email variable, add “unique=true”. This means our database won’t accept two of the same emails if they are added to the database:
/**

* @ORM\Column(type="string", length=255, unique=true)
*/
private $email;
Add one more function at the end of the file called toArray. Function is converting our object to array so we can display it in our JSON response:
public function toArray()

{
return [
'id' => $this->getId(),
'firstName' => $this->getFirstName(),
'lastName' => $this->getLastName(),
'email' => $this->getEmail(),
'phoneNumber' => $this->getPhoneNumber()
];
}
If you are happy with your entity and its functions, we can generate and run our first migration version:
bin/console make:migration

bin/console doctrine:migrations:migrate
And now your database should look something like this:

If you’ll ever want to expand your Entities but already have a migration file, no worries. Whenever you make a change to your entity simply run the two commands above the picture and you are good.
Mock It Up!
For this tutorial, we need some data so we can play around with our CRUD. Enter Faker! With Faker you can add a variety of random information to your database (phone number, emails, first names, last names, etc …). For using fixtures in Symfony run this command and it will generate DataFixtures folder:
composer require --dev orm-fixturesInside you will see AppFixtures.php file that extends Fixtures. We will simply add Faker and a small For loop for adding data to our database like this:
class AppFixtures extends Fixture

{
public function load(ObjectManager $manager)
{
$faker = Factory::create();

for ($i = 0; $i < 50; $i++) {
$customer = new Customer();
$customer->setFirstName($faker->firstName);
$customer->setLastName($faker->lastName);
$customer->setEmail($faker->email);
$customer->setPhoneNumber($faker->phoneNumber);
$manager->persist($customer);
}

$manager->flush();
}
}
This will then populate our database with 50 records of random customers:
bin/console doctrine:fixtures:loadOur first (and only) controller Creating
Create a CustomerController class in the Controller folder and add annotations to your project so we can adjust our routes:
composer require annotationsIn your CustomerController, we will make a function called addCustomer which is going to do exactly what it’s called.
class CustomerController

{
private $customerRepository;

public function __construct(CustomerRepository $customerRepository)
{
$this->customerRepository = $customerRepository;
}

/**
* @Route("/customers/", name="add_customer", methods={"POST"})
*/
public function add(Request $request): JsonResponse
{
$data = json_decode($request->getContent(), true);

$firstName = $data['firstName'];
$lastName = $data['lastName'];
$email = $data['email'];
$phoneNumber = $data['phoneNumber'];

if (empty($firstName) || empty($lastName) || empty($email) || empty($phoneNumber)) {
throw new NotFoundHttpException('Expecting mandatory parameters!');
}

$this->customerRepository->saveCustomer($firstName, $lastName, $email, $phoneNumber);

return new JsonResponse(['status' => 'Customer created!'], Response::HTTP_CREATED);
}
}
We have a constructor where we injected CustomerRepository class which we are going to update with a function for saving the data to the database. From the Request, we will get our data and json_decode function makes it into the array so we can add them to our corresponding variables. Before we pass variables to our saveCustomer function we check if they are empty since all our fields in the database are not nullable.
In CustomerRepository modify your code like this:
class CustomerRepository extends ServiceEntityRepository

{
private $manager;

public function __construct
(
ManagerRegistry $registry,
EntityManagerInterface $manager
)
{
parent::__construct($registry, Customer::class);
$this->manager = $manager;
}

public function saveCustomer($firstName, $lastName, $email, $phoneNumber)
{
$newCustomer = new Customer();

$newCustomer
->setFirstName($firstName)
->setLastName($lastName)
->setEmail($email)
->setPhoneNumber($phoneNumber);

$this->manager->persist($newCustomer);
$this->manager->flush();
}
}
We passed our variables from the controller to our saveCustomer function where we set them and, in the end, store them to our database.
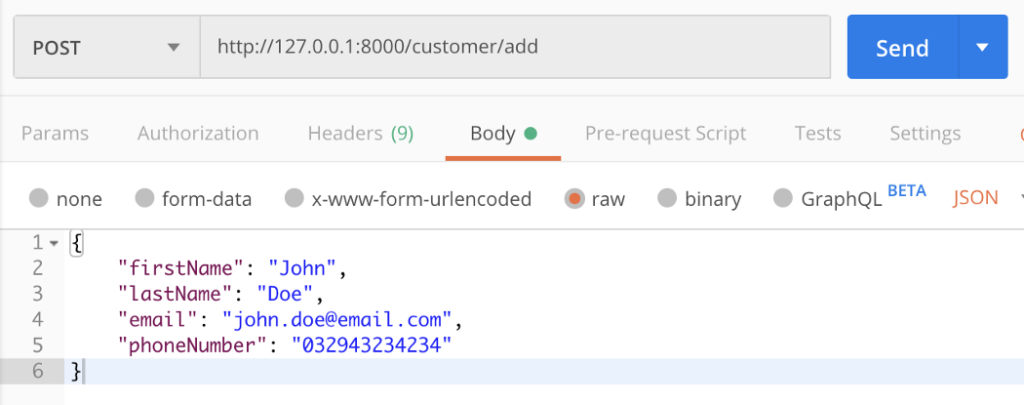
To try this out, download Postman from the link below:

And in the end, if everything is okay after your pressed “Send”, the response should be just as the one below the request:

Congratulations! You have completed your C out of CRUD.
Reading
Now we will make a function that will retrieve one of our Customer records from the database when you provide an ID number in URL:
/**

* @Route("/customers/{id}", name="get_one_customer", methods={"GET"})
*/
public function get($id): JsonResponse
{
$customer = $this->customerRepository->findOneBy(['id' => $id]);

$data = [
'id' => $customer->getId(),
'firstName' => $customer->getFirstName(),
'lastName' => $customer->getLastName(),
'email' => $customer->getEmail(),
'phoneNumber' => $customer->getPhoneNumber(),
];

return new JsonResponse($data, Response::HTTP_OK);
}
Very simple function and again we use a function that’s in CustomerRepository by default, called findOneBy. Since we are getting an object as a response, we need to separate it into variables. Your postman GET request should look like this (if your link is {host}/customers/2):

If you want to take another route that will fetch all the Customer records, add this function:
/**

* @Route("/customers", name="get_all_customers", methods={"GET"})
*/
public function getAll(): JsonResponse
{
$customers = $this->customerRepository->findAll();
$data = [];

foreach ($customers as $customer) {
$data[] = [
'id' => $customer->getId(),
'firstName' => $customer->getFirstName(),
'lastName' => $customer->getLastName(),
'email' => $customer->getEmail(),
'phoneNumber' => $customer->getPhoneNumber(),
];
}

return new JsonResponse($data, Response::HTTP_OK);
}
Updating
At the beginning of the tutorial I mentioned that I will be explaining the dierence between PUT and PATCH. When you want to update the whole object you should use PUT method, but when you want to partially update an existing object you will use the PATCH method. In this example, I will be using only PUT method but will use some other schemes to see if our object is going to be fully updated. I will make updateCustomer function that receives the ID of customers we want to update and a request with the data we want to modify. Before we pass the variables to our updateCustomer function we have to check if they are empty. The function looks like this:
/**

* @Route("/customers/{id}", name="update_customer", methods={"PUT"})
*/
public function update($id, Request $request): JsonResponse
{
$customer = $this->customerRepository->findOneBy(['id' => $id]);
$data = json_decode($request->getContent(), true);

empty($data['firstName']) ? true : $customer->setFirstName($data['firstName']);
empty($data['lastName']) ? true : $customer->setLastName($data['lastName']);
empty($data['email']) ? true : $customer->setEmail($data['email']);
empty($data['phoneNumber']) ? true : $customer->setPhoneNumber($data['phoneNumber']);

$updatedCostumer = $this->customerRepository->updateCustomer($customer);

return new JsonResponse($updatedCostumer->toArray(), Response::HTTP_OK);
}
CustomerRepository also needs a new update, the updateCustomer function:
public function updateCustomer(Customer $customer): Customer

{
$this->manager->persist($customer);
$this->manager->flush();

return $customer;
}
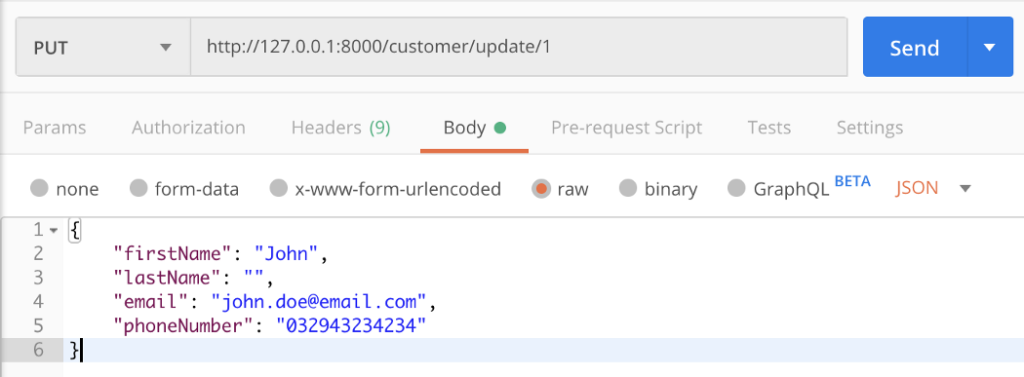
Now our Postman is looking like this:

This has modified our Customer with ID number one. We changed everything, except his last name. So if you want to check out if your user truly changed in the database, you can use your own function that we wrote earlier getOneCustomer.
Deleting
The last letter of our CRUD tutorial is ready to be written in a form of function. We want to delete a record from our database. No problem, we will provide our function an ID and it will delete the record for us:
/**

* @Route("/customers/{id}", name="delete_customer", methods={"DELETE"})
*/
public function delete($id): JsonResponse
{
$customer = $this->customerRepository->findOneBy(['id' => $id]);

$this->customerRepository->removeCustomer($customer);

return new JsonResponse(['status' => 'Customer deleted'], Response::HTTP_NO_CONTENT);
}
Almost there – CustomerRepository is missing our removeCustomer function. It’s very simple and probably the smallest function we will write today:
public function removeCustomer(Customer $customer)

{
$this->manager->remove($customer);
$this->manager->flush();
}
Try it out with your Postman request! Delete any number you like between 1 and 50. Or delete them all, I leave it up to you.
Swagging
Swagger is an Open Source API documentation tool that can, in an easy way help you test and document your APIs. If you document your controllers and functions the way Swagger understands it, he will automatically generate a testable list of your endpoints.

Unfortunately, Swagger is not yet compatible in Symfony 5.0 version due to the requirements of other components that are provided automatically with a framework (framework-extra-bundle). But I will make sure to keep this up to date when a new version of NelmioAPI comes out.
In the meantime, you can find the whole project here:
https://github.com/LukaGado/Symfony5---The-REST-the-CRUD-and-the-SwagThanks for reading!